Introduction
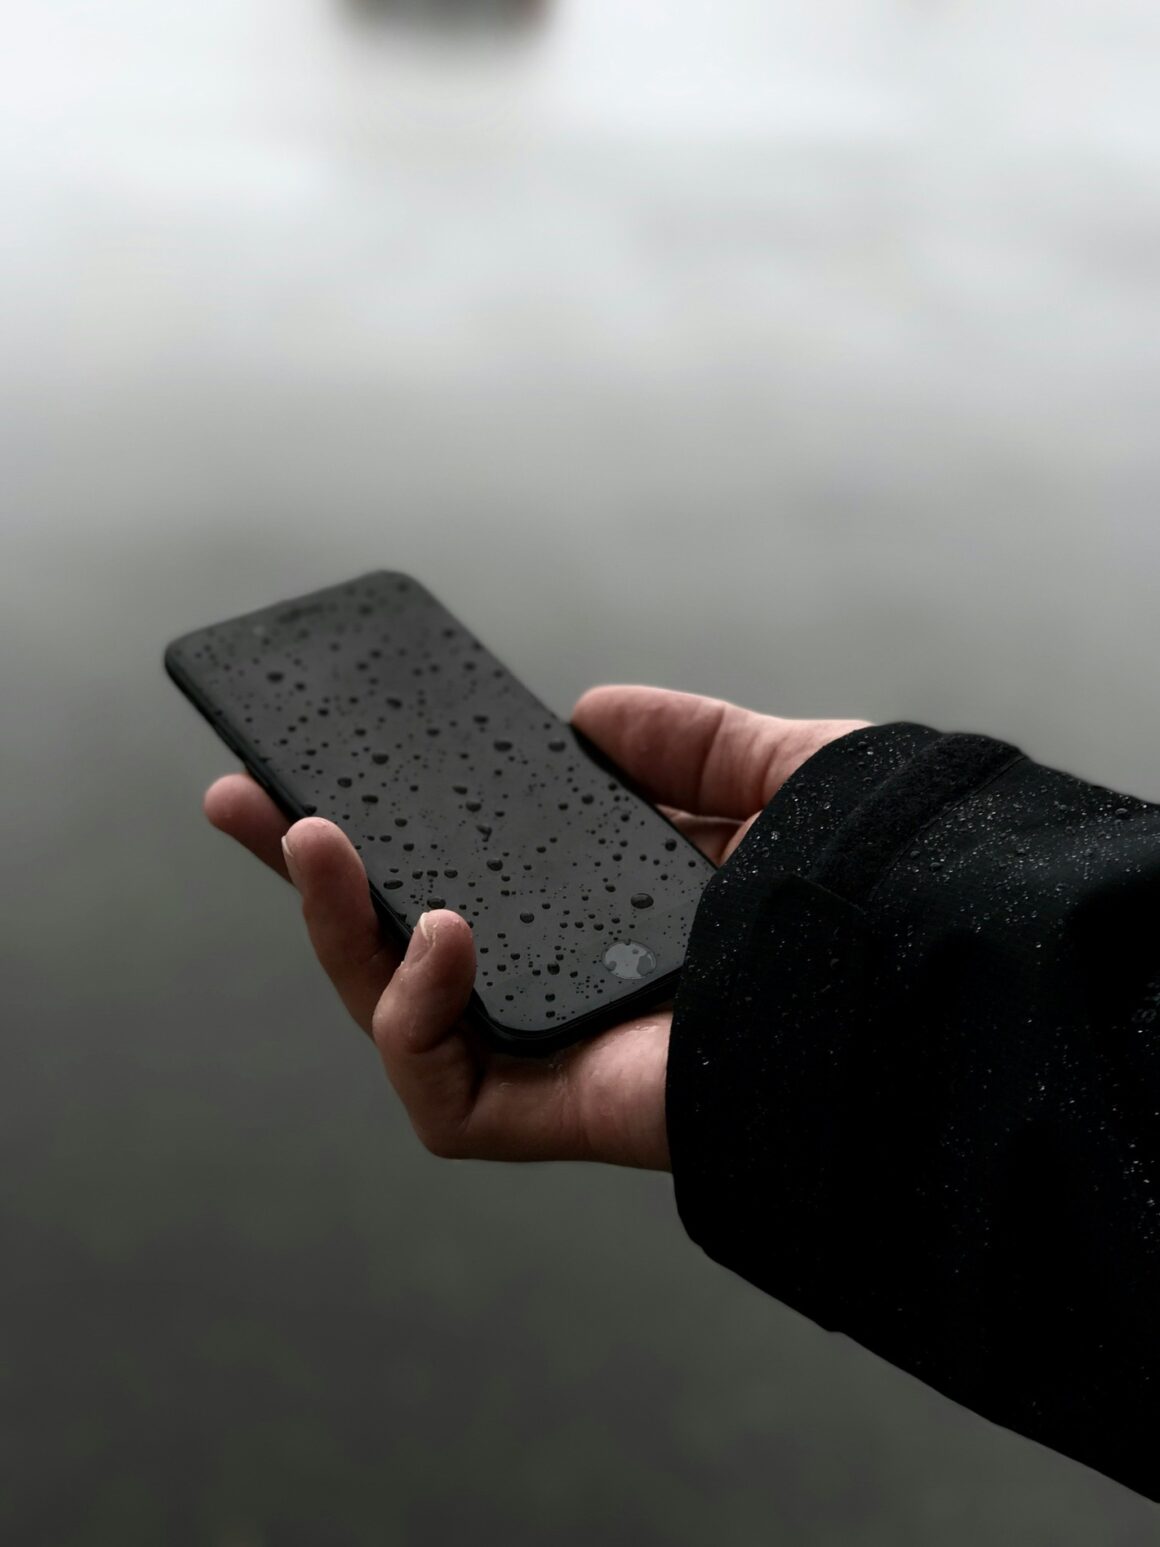
iPhones are marvels of modern technology, seamlessly blending sophisticated design with robust functionality. However, despite their advanced features, iPhones, like any electronic device, remain vulnerable to one of the most common accidents: water damage. It’s an issue that many iPhone users have encountered – from a phone slipping into a sink full of water to getting caught in a sudden downpour. The prevalence of water damage incidents with iPhones underscores the importance of understanding both the prevention and the solution to this problem.
Knowing how to handle a water-damaged iPhone can be the difference between a minor inconvenience and a costly mistake. Quick and appropriate reactions not only increase the chances of your phone surviving a water accident but can also save you from the potential loss of precious data and memories stored on your device.
In this article, we’ll dive into the crucial steps you should take if your iPhone encounters water. We’ll discuss immediate actions to mitigate damage, provide in-depth solutions for different scenarios of water exposure, and offer tips for diagnosing and repairing a water-damaged iPhone. Additionally, we’ll explore preventative measures to protect your iPhone from water damage in the future. Whether you’ve just rescued your iPhone from an aquatic mishap or you’re looking to arm yourself with knowledge for the future, this guide will equip you with everything you need to know about iPhone water damage: initial steps, solutions, and prevention.
II. Understanding iPhone Water Damage
Understanding the nuances of water damage in iPhones is critical for effective prevention and repair. Water damage in iPhones refers to any harm caused by liquid contact, which can range from minor issues like distorted audio output to major problems such as complete system failure. Unlike other forms of damage, water damage is insidious because it affects the internal components of the iPhone, often leading to delayed symptoms or immediate malfunction, depending on the extent of the exposure.
Common Causes of iPhone Water Damage
Water damage to iPhones can occur in a variety of ways. Some of the most common causes include:
- Accidental Immersion: This could be dropping your iPhone in bodies of water like sinks, toilets, bathtubs, or swimming pools.
- Environmental Exposure: Exposure to high humidity environments, heavy rain, or getting caught in a storm.
- Spills: Everyday accidents, like spilling drinks or liquids onto the device.
- Condensation: Occurring from rapid temperature changes, such as moving from an air-conditioned space to a hot, humid environment.
Each of these scenarios presents a unique challenge in terms of the water’s potential impact on the device.
Early Signs of Water Damage in iPhones
Early detection of water damage can be crucial in saving your iPhone. Some telltale signs include:
- Screen Issues: Unusual screen behaviors like flickering, black spots, or a blank screen can indicate liquid damage.
- Audio Problems: Muffled or distorted sound from the speakers or microphone not working correctly.
- Charging Issues: The iPhone refuses to charge or charges intermittently.
- Warning Messages: The iPhone displays a temperature warning despite not being exposed to extreme temperatures.
- Corrosion: Visible signs of corrosion or discoloration inside the charging port or headphone jack.
- Functionality Glitches: Random reboots, unresponsive buttons, or touch screen issues.
It’s important to note that these symptoms might not appear immediately. Sometimes, it can take days or even weeks for the signs of water damage to become evident. Therefore, if you suspect that your iPhone has been exposed to water, it’s advisable to take preventative measures immediately, even if the device seems to be working fine.
In the next section, we will explore the immediate actions to take when your iPhone encounters water, emphasizing the steps that can potentially save your device from long-term damage.
III. Immediate Actions: Initial Steps to Take
When your iPhone gets wet, the actions you take within the first few moments can significantly influence the likelihood of your phone surviving the ordeal. Here’s what you should do immediately:
- Power Off the Device: Turn off your iPhone immediately. Continuing to use it can cause short circuits.
- Remove External Accessories: Unplug any headphones, chargers, or external devices.
- Wipe it Dry: Gently wipe the exterior with a soft, lint-free cloth to remove as much water as possible.
- Eject Water from Ports: Lightly tap the iPhone against your hand with the Lightning port facing down to remove water from the port.
- Remove the SIM Card: Take out the SIM card and the tray. This also helps to open up a little space for air to circulate inside.
The Dos and Don’ts of Handling a Wet iPhone
Do:
- Keep the iPhone upright.
- Place it in a well-ventilated area to aid drying.
- Use silica gel packets or uncooked rice as desiccants to help absorb moisture if professional drying tools aren’t available.
Don’t:
- Don’t use a hairdryer to dry your iPhone. The heat can damage internal components.
- Avoid pressing any buttons or using the touchscreen, as this can push water further into the device.
- Steer clear of charging the device until you’re certain it’s dry.
Quick Home Remedies for iPhone Water Damage
While professional repair is the safest option, there are a few home remedies you can try:
- Silica Gel Packets: If available, place the iPhone in a container filled with silica gel packets. These are more effective than rice in absorbing moisture.
- Uncooked Rice: As a more accessible alternative, you can also place your iPhone in a bowl of uncooked rice. Ensure the device is completely covered and leave it for 24-48 hours.
- Open Air Drying: Sometimes, simply leaving the phone in a dry, well-ventilated space can be effective. Prop it up against something and turn it over every few hours.
Remember, these home remedies are not guaranteed fixes and are best used as a first response while preparing for professional repair. In the next section, we’ll delve into more in-depth solutions for handling water-damaged iPhones, ensuring you’re equipped with the knowledge to handle this common but challenging issue.
IV. In-Depth Solutions for Water Damaged iPhones
Dealing with a water-damaged iPhone can be daunting, but understanding your options and the steps involved in fixing it can make the process more manageable. Here’s a deeper dive into resolving water damage issues.
Step-by-Step Guide on Fixing a Water-Damaged iPhone
- Assess the Damage: Once your iPhone is dry to the touch, examine it for any visible signs of damage. Check the liquid contact indicator (LCI) located inside the SIM card slot – it turns red when exposed to water.
- Power On Carefully: After at least 48 hours of drying, try turning on the iPhone. If it doesn’t turn on or if you notice any abnormal behavior, it’s time to consider professional repair.
- Backup Data: If the iPhone powers on, immediately backup your data. This can be done via iCloud or by connecting your device to a computer.
- Cleaning Internally (Advanced): If you’re experienced with electronics, you can disassemble the iPhone to clean any corrosion using isopropyl alcohol and a soft brush. This step is risky and not recommended for those unfamiliar with electronic repair.
- Testing Functionality: After reassembling, test all functions of the iPhone – screen response, camera, buttons, sound, and charging capability.
Professional vs. DIY Repair: Pros and Cons
Professional Repair:
- Pros:
- Expertise and experience in handling water damage.
- Access to the right tools and parts.
- Often comes with a service warranty.
- Cons:
- Can be costly.
- May take longer depending on the repair center’s workload.
DIY Repair:
- Pros:
- Potentially less expensive.
- Immediate action without waiting for a professional.
- Cons:
- Risk of further damaging the iPhone.
- No warranty or guarantee of repair.
- Requires specific tools and skills.
How to Dry Out a Wet iPhone Safely
- Use Silica Gel or Desiccants: As mentioned earlier, silica gel packets are excellent for absorbing moisture. Place these around your iPhone in a sealed container for a couple of days.
- Avoid Heat Sources: Never place the iPhone near a heater, in direct sunlight, or use a hairdryer. Excessive heat can damage the iPhone further.
- Patience is Key: Allow ample time for the iPhone to dry out completely. Rushing this process by turning on or charging the phone can lead to short-circuits and irreversible damage.
Handling a water-damaged iPhone requires a blend of immediate action, careful assessment, and sometimes the wisdom to seek professional help. Remember, the best solution often depends on the severity of the damage and your comfort level with technology repairs. In the following sections, we will explore how to identify the signs of water damage and the preventive measures to protect your iPhone from future accidents.
V. iPhone Water Damage Indicators and Diagnosis
Detecting water damage in an iPhone isn’t always straightforward, especially since the effects can range from subtle to severe. Knowing how to identify water damage and assess its extent is crucial in deciding the best course of action for repair or replacement.
How to Tell if Your iPhone is Water-Damaged
- Check the Liquid Contact Indicator (LCI): Apple iPhones come with a built-in Liquid Contact Indicator. This small indicator, located inside the SIM card slot, is normally white or silver. If it has turned red or pink, it means the device has been in contact with liquid. You can check this using a flashlight.
- Look for Visible Signs: Sometimes, you might see water droplets under the screen, fogging within the camera lenses, or discoloration on the screen.
- Behavioral Symptoms: The iPhone may exhibit unusual behaviors like not turning on, having a distorted display, unresponsive buttons, or not charging properly.
Using iPhone Water Damage Indicators
Apple’s use of LCIs in iPhones is a direct way to assess for water damage. This feature is designed to help technicians (and users) quickly determine if a device has been exposed to liquid. The location of the LCI varies depending on the model of the iPhone, so it’s advisable to look up the specific location for your model. Keep in mind that the LCI only turns red upon direct contact with water or a liquid containing water, and it won’t be activated by changes in humidity or temperature.
Assessing the Extent of Water Damage
Determining how badly your iPhone has been damaged by water involves a few considerations:
- Duration of Exposure: The length of time your iPhone was in contact with water greatly affects the extent of the damage. The longer the exposure, the higher the likelihood of serious damage.
- Type of Liquid: Clean water is less harmful than other liquids like salt water, sodas, or alcoholic beverages, which can cause corrosion and other issues more rapidly.
- Response Time: How quickly you took measures to dry and turn off your iPhone can also influence the extent of the damage.
- Functional Test: If your iPhone turns on, test all functionalities, including the camera, microphone, speakers, touch screen, and charging capabilities. Malfunctions in these areas can indicate internal damage.
Understanding the indicators and assessing the extent of water damage are critical first steps in dealing with a water-damaged iPhone. This knowledge not only helps in making informed decisions about repairs but also in effectively communicating the issue if seeking professional help. Next, we’ll look into the repair and recovery options available for a water-damaged iPhone.
VI. Repair and Recovery Options
Dealing with a water-damaged iPhone can feel overwhelming, but understanding your repair and recovery options can help you navigate this challenge more effectively.
Options for Repairing Your Water-Damaged iPhone
- Apple Authorized Service Providers: The safest option is to take your iPhone to an Apple Authorized Service Provider. They have trained technicians who can assess and repair the damage. However, it’s worth noting that Apple’s standard warranty doesn’t cover water damage, so this could be a costly option, especially if you don’t have AppleCare+.
- Third-Party Repair Services: There are numerous third-party repair services that can fix water damage. While often more affordable than Apple’s service, it’s crucial to choose a reputable provider to avoid poor-quality repairs.
- DIY Repair Kits: For the technically savvy, there are DIY repair kits available online. These kits come with the necessary tools and instructions, but using them requires a good understanding of iPhone hardware and a steady hand.
Cost Considerations for iPhone Water Damage Repair
The cost of repairing a water-damaged iPhone varies greatly depending on the severity of the damage and the chosen repair method:
- Apple Service: It can be the most expensive option, particularly for out-of-warranty repairs. Prices vary depending on the model of the iPhone.
- Third-Party Repairers: Typically more affordable than Apple, but it’s important to weigh the cost against the potential risk of further damage or voiding any remaining warranty.
- DIY Approach: Generally the cheapest option, but it comes with the risk of incorrect repair or further damage.
It’s always a good idea to get a quote before proceeding with any repair option.
Data Recovery: Salvaging Your Data from a Water-Damaged iPhone
Data recovery can be a major concern when dealing with water damage. Here are some steps to consider:
- Backup Retrieval: If you’ve been regularly backing up your iPhone to iCloud or your computer, you should be able to retrieve your data from these backups.
- Professional Data Recovery Services: If you haven’t backed up your data, or if the data on your device is particularly valuable, you might consider a professional data recovery service. These services can sometimes retrieve data from damaged devices, but success is not guaranteed and can be costly.
- Future Precautions: Use this experience as a reminder to regularly back up your data to avoid similar stress in the future.
Navigating through the repair and recovery process requires balancing the cost, the extent of the damage, and the value of the data on your iPhone. It’s a delicate decision-making process that should be approached with as much information and care as possible. In the next section, we’ll explore preventive measures to help protect your iPhone from water damage in the future.
VII. Prevention: Keeping Your iPhone Safe from Water Damage
As the saying goes, “prevention is better than cure,” and this couldn’t be truer when it comes to safeguarding your iPhone against water damage. Let’s explore some practical tips and best practices to keep your iPhone dry and functional.
Tips for Preventing Water Damage in iPhones
- Be Mindful of Your Environment: Always be aware of where you place your iPhone. Avoid leaving it near sinks, bathtubs, windows, or any place where it could come into contact with water.
- Use a Waterproof Case: Investing in a good quality waterproof case can be a game-changer, especially if you’re often around water. These cases offer a robust defense against accidental spills, splashes, and even brief submersions.
- Avoid Using Your iPhone in the Bathroom: It might be tempting to scroll through your phone during a bath or while brushing your teeth, but bathrooms are high-risk areas for water damage.
- Be Cautious in the Kitchen: Cooking or doing dishes with your iPhone nearby can lead to accidental splashes or spills. Keep it at a safe distance from sinks and liquids.
Protective Accessories and Their Effectiveness
- Waterproof Cases: These cases are specifically designed to prevent water from getting inside your iPhone. They are highly effective for everyday splashes and can even protect your phone in up to several feet of water, depending on the product specifications.
- Water-Resistant Pouches: For activities like swimming or boating, a water-resistant pouch can be a great option. These pouches offer a sealable, watertight barrier around your phone.
- Nano Coating: Some services offer a nano-coating treatment for smartphones. This invisible coating repels water, offering an additional layer of protection, though it’s not a substitute for a waterproof case.
Best Practices for iPhone Usage Near Water
- Exercise Caution: Always be extra cautious when using your iPhone near pools, beaches, or in the rain. Even a small amount of water can cause significant damage.
- Use Waterproof Accessories: If you plan to be near water, accessories like waterproof Bluetooth speakers and earphones can be a safer alternative to using your iPhone directly.
- Regular Maintenance: Regularly check the seals of your iPhone’s waterproof case, if you use one, and ensure there’s no damage or wear that could compromise its effectiveness.
By adopting these preventive measures, you can significantly reduce the risk of water damage to your iPhone. Remember, while these tips can offer substantial protection, they are not foolproof. The best protection is always a combination of careful usage, protective accessories, and regular maintenance.
Conclusion
Navigating the choppy waters of iPhone water damage can be less daunting when you’re equipped with the right knowledge and tools. We’ve journeyed through understanding what iPhone water damage is, spotting the early signs, taking immediate action, and delving into repair and recovery options. More importantly, we’ve explored how to prevent such accidents from happening in the first place.
Remember, the key to dealing with water damage is swift action and informed decisions. From the immediate steps of turning off your phone and drying it, to considering professional repair or DIY methods, every decision plays a crucial role in the fate of your water-damaged iPhone. Moreover, prevention — through mindful usage, protective accessories, and regular backups — is your first and most reliable line of defense.
As we wrap up this guide, I encourage you to take these insights and integrate them into your daily digital life. Invest in a good waterproof case, be cautious around water, and most importantly, keep your data backed up regularly.
But hey, we’re all in this together! I’d love to hear your stories and tips too. Have you ever had to rescue your iPhone from a water mishap? What worked for you? Share your experiences and advice in the comments below. Your insights could be the lifesaver for someone’s waterlogged device!


