


Introduction
In today’s digital age, having a reliable home network is not just a luxury but a necessity. From streaming movies and playing online games to connecting multiple devices and even working from home, a robust network setup acts as the backbone for all your online activities. But it’s not just about having any network; it’s crucial to establish a secure and efficient network to protect your data and optimize performance.
In this comprehensive guide, you’ll learn everything you need to know about setting up your own home network. We’ll start by discussing the importance of having a network at home and then delve into various types, the equipment you’ll need, and step-by-step instructions for network setup. We’ll also cover advanced features and how to keep your network secure. So, whether you are a complete beginner or looking to optimize your existing setup, this article will serve as your roadmap.
By the end of this article, you’ll be equipped with the knowledge and skills to set up a secure, efficient, and highly functional home network that meets your specific needs.
Why You Need a Home Network
When considering the installation or upgrade of a home network, you might wonder, “Why do I even need a sophisticated network setup?” The answer is multifaceted, and the benefits extend beyond simply connecting to the internet. Here are some compelling reasons why setting up a home network should be on your to-do list:
Connectivity Between Devices
In the modern home, it’s not just your computer that requires an internet connection. Smartphones, tablets, smart TVs, gaming consoles, and even smart home devices like thermostats and doorbell cameras all rely on a strong network connection. Having a robust home network ensures that all these devices can interact seamlessly, whether you’re streaming video on your TV or sending files from your laptop to your printer.
Sharing Internet Resources
A well-configured network allows for the equitable distribution of internet resources. Everyone in the home can enjoy high-speed internet for their specific needs, be it online classes, work, or entertainment. Moreover, advanced network setups enable features like guest networks, which allow visitors to access the internet without compromising the security of your main network.
Enhanced Security
Speaking of security, an adequately set up home network acts as the first line of defense against external threats. Features like firewalls, strong encryption protocols, and VPN compatibility ensure that your online activities remain private and that your personal data is safe from hackers or unauthorized users.
Easier Management
Last but not least, having a home network simplifies the task of managing your various connected devices. Centralized settings make it easy to add new devices, set parental controls, or even isolate a device that might be acting suspiciously. You can monitor bandwidth usage, prioritize devices, and perform troubleshooting tasks, all from a single interface.
In summary, setting up a home network is not just an optional endeavor but a necessity for modern living. The benefits are numerous and go far beyond the basic need for internet access, providing enhanced connectivity, security, and ease of management for all your online needs.
Types of Home Networks
After understanding the importance and benefits of a home network, the next crucial step is to determine the type of network that best suits your needs. Home networks are generally categorized into two primary types: Wired (Ethernet) and Wireless (Wi-Fi). Both have their pros and cons, and often, a combination of the two is used for optimal performance. Here’s a closer look at these network types:
Wired Networks (Ethernet)
Wired networks primarily use Ethernet cables to connect devices to the network. These networks are known for their reliability and high-speed data transfer rates.
Advantages:
- Speed: Ethernet connections can offer faster speeds compared to Wi-Fi, especially over short distances.
- Stability: Wired connections are less prone to interference and offer a stable connection.
- Security: Physical connections are typically more secure than wireless ones since unauthorized access requires physical connection to a network port.
Disadvantages:
- Inflexibility: Devices need to be physically connected to the network, limiting mobility.
- Installation: Setting up a wired network often involves running cables through walls and ceilings, which can be labor-intensive.
Wireless Networks (Wi-Fi)
Wireless networks, commonly known as Wi-Fi networks, offer the convenience of mobility within the coverage area. They’re easier to set up and offer the flexibility to connect multiple devices without any cables.
Advantages:
- Convenience: No need for physical cables, allowing you to move freely within the network range.
- Ease of Setup: Typically, setting up a Wi-Fi network involves fewer steps and less hardware than a wired network.
- Scalability: Easy to add new devices to the network without requiring additional cabling.
Disadvantages:
- Speed: While Wi-Fi technology has advanced considerably, it still generally offers slower speeds compared to wired connections.
- Security Risks: Without proper security measures, Wi-Fi networks can be more vulnerable to unauthorized access.
- Interference: Other electronic devices and networks can interfere with wireless signals, potentially reducing speed and reliability.
Hybrid Networks
Many modern homes use a combination of both wired and wireless network setups to capitalize on the strengths of each. For instance, desktop computers and gaming consoles that require high-speed connections can be wired, while smartphones, tablets, and laptops can connect wirelessly.
By understanding the types of home networks available, you can make an informed decision that caters to your specific needs and offers the best combination of speed, security, and convenience.
What You’ll Need for Setup
Now that you understand the significance of having a home network and the types available, it’s time to dive into the nuts and bolts. Setting up a home network involves both hardware and software components, so it’s important to know what you’ll need before you get started.
Essential Hardware
Modem
The modem serves as the gateway between your home network and the Internet. It converts digital data from your local network into a format suitable for transmission over your Internet Service Provider’s (ISP) infrastructure. Some ISPs provide a modem as part of your subscription, but you also have the option to purchase one that better fits your needs.
Router
A router is essentially the “traffic cop” of your home network, directing data packets between devices and to and from the Internet. While some modems come with built-in routers, having a separate router often provides more features and better control over your network settings.
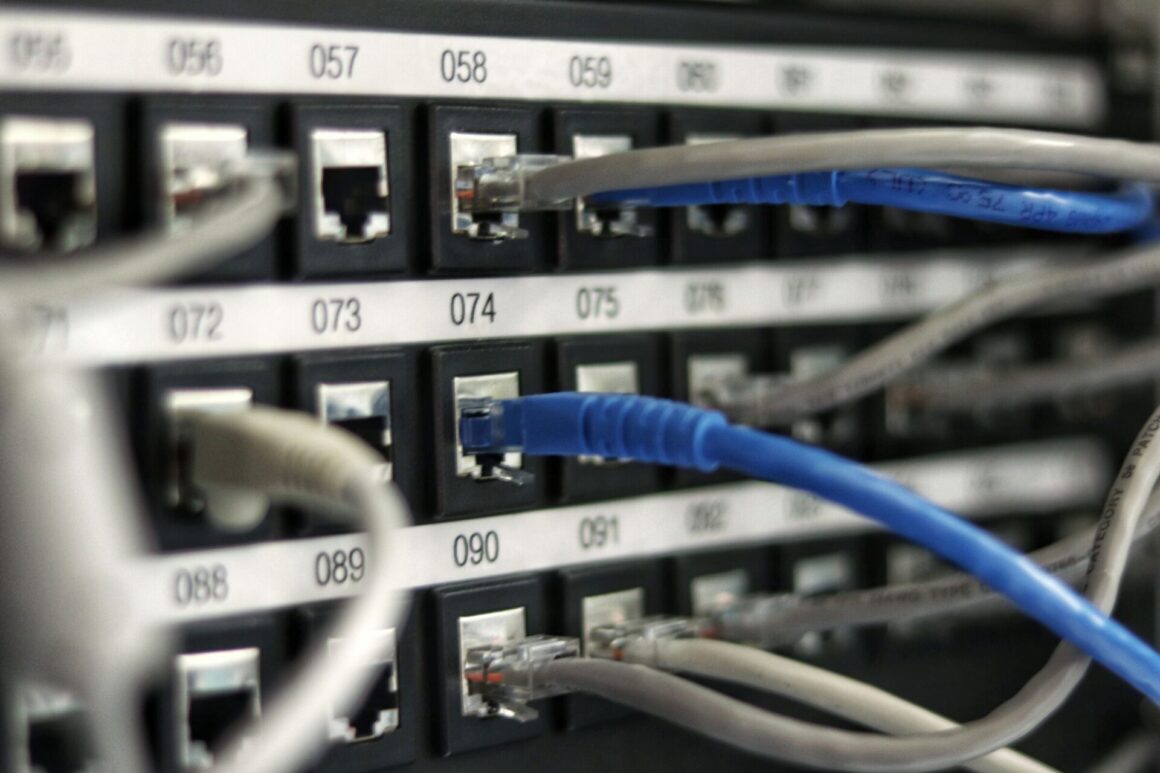
Ethernet Cables
For a wired network, Ethernet cables are essential for connecting your devices to the router. They come in different categories, such as Cat 5, Cat 6, and Cat 7, each offering different speeds and lengths. Make sure to choose the appropriate cables based on your network requirements.
Devices
Of course, what’s a network without devices? This includes computers, smartphones, smart TVs, gaming consoles, and other IoT devices like smart thermostats or security cameras. Each device will either connect to your network wirelessly via Wi-Fi or through a physical Ethernet connection.
Essential Software
Network Management Software
While not strictly necessary, network management software can make it easier to manage and monitor your network. Many routers come with their own apps or web-based interfaces for this purpose.
Security Software
To enhance your network’s security, you may want to consider installing a firewall or antivirus software on your devices. Some advanced routers also come with built-in security features like threat detection and parental controls.
Conclusion
Before you start the process of setting up your home network, it’s crucial to gather all the necessary hardware and software components. Having the right modem, router, Ethernet cables, and devices ensures that your network will not only be functional but also optimized for your specific needs. In the next sections, we’ll walk you through the steps to set up both wired and wireless networks.
Preparing for Setup
Before diving into the actual setup of your home network, some preparatory steps are crucial for ensuring a smooth installation process. Think of this phase as the groundwork that helps to avoid potential issues down the line. Here’s what you need to focus on when preparing for setup:
Check Internet Connection
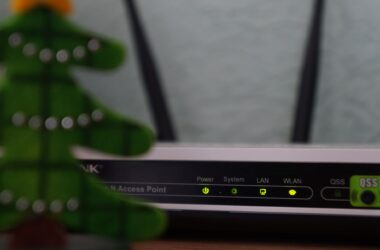
The first step is to confirm that your internet connection is active and stable. Plug your modem into the wall socket and connect it to your Internet Service Provider (ISP) using a coaxial or DSL cable, depending on your service type. Most modems have indicator lights that signal an active internet connection. If you don’t see these lights or encounter issues, you might want to contact your ISP for troubleshooting.
Update Router Firmware
Outdated firmware can not only expose your network to security vulnerabilities but also hinder performance. Therefore, it’s crucial to ensure your router is running the latest firmware version before proceeding with the network setup.
Here’s a general guideline for updating router firmware:
- Locate the Model Number: Check your router’s label or manual for the model number.
- Visit Manufacturer’s Website: Go to the support section of your router manufacturer’s website and search for firmware updates using the model number.
- Download Firmware: If an update is available, download the firmware file to your computer.
- Log into Router’s Admin Panel: Open a web browser and enter your router’s IP address (commonly
192.168.1.1or192.168.0.1). Login with the admin credentials, usually found in your router’s manual or the bottom of the router. - Update Firmware: Navigate to the firmware update section, typically under ‘System’ or ‘Administration’. Upload the downloaded firmware file and follow the on-screen instructions to complete the update.
Note: Updating firmware can interrupt network service, so ensure no critical tasks are running on your network during the update.
Conclusion
Proper preparation is key to a successful network setup. By ensuring a stable internet connection and updating your router firmware, you lay a solid foundation for the installation process. With these preparatory steps complete, you can move on to the actual setup with confidence that you’re off to a good start.
Step-by-Step Home Network Setup Guide
Setting up your home network need not be a daunting task. With the right steps and a little patience, you can establish a secure and efficient network on your own. This step-by-step guide will walk you through the process of setting up both a wired and a wireless home network.
Wired Network Setup
Wired networks are known for their speed and stability, making them ideal for activities that require high data transfer rates like gaming or streaming high-definition content.
How to Set Up a LAN (Local Area Network)
- Connect the Modem: If you haven’t already, plug your modem into the wall socket and connect it to your ISP’s line using the appropriate cable (coaxial or DSL).
- Attach the Router: Connect the modem to the WAN (Wide Area Network) port on your router using an Ethernet cable.
- Connect Devices: Using additional Ethernet cables, connect your devices (PCs, gaming consoles, etc.) to the LAN ports on your router.
- Power On: Turn on the modem, wait for a few minutes for it to establish a connection, and then power on the router.
- Configure Router: Access the router’s admin panel through a web browser on a connected device and set up your network preferences.
Connecting to WAN (Wide Area Network)
- ISP Credentials: Log into the router’s admin panel and enter the ISP credentials (username and password) provided by your service provider.
- IP Configuration: Most ISPs provide dynamic IPs, but if you’ve been given a static IP, enter the details in the IP configuration section.
- Test Connection: Save settings and restart your router. Test the WAN connection by attempting to browse the internet on a connected device.
Wireless Network Setup
Wireless networks offer the advantage of mobility and are easier to set up compared to wired networks.
Configuring Wi-Fi
- Access Router Admin: Open a web browser and log into your router’s admin panel.
- Wi-Fi Settings: Navigate to the wireless settings section.
- SSID and Security: Choose a name (SSID) for your Wi-Fi network and set up a strong password. Enable WPA3 or WPA2 encryption for better security.
- Save and Restart: Save your settings and restart your router to apply changes.
Connecting Multiple Devices
- Scan for Networks: On your wireless devices (smartphones, laptops, etc.), scan for available Wi-Fi networks.
- Select Network: Choose your network’s SSID from the list.
- Enter Password: Input the password you set up earlier and connect.
- Test Connection: Open a web browser and try accessing the internet to confirm the device is properly connected.
Conclusion
Setting up a home network, be it wired or wireless, is a manageable task when broken down into steps. By carefully following this step-by-step home network setup guide, you can establish a secure, efficient network tailored to your specific needs. With your new network in place, you’re ready to make the most of your connected life.
Network Security Measures
Once your home network is up and running, your next priority should be securing it. A poorly secured network is a tempting target for hackers and can expose your personal data to various risks. This section outlines essential network security measures you should consider to protect your home network effectively.
Setting a Strong Password
Using a strong, unique password is the first line of defense for your network. When choosing a password:
- Use a Mixture: Include a mix of upper and lower case letters, numbers, and special characters.
- Avoid Personal Information: Never use easily guessable information like birthdays or names.
- Length Matters: Aim for at least 12-16 characters for added security.
Enabling Firewall
A firewall acts as a barrier between your home network and potential threats from the internet. Most routers have built-in firewalls that can be activated via the router’s admin panel. Make sure to:
- Check Status: Verify if the firewall is enabled. If not, turn it on.
- Configure Rules: Set up specific rules for inbound and outbound traffic if required.
- Update Regularly: Make sure the firewall is updated to the latest version for optimal protection.
MAC Address Filtering
Media Access Control (MAC) address filtering is a method where you whitelist or blacklist devices based on their unique MAC addresses.
- Find MAC Addresses: Locate the MAC addresses of all devices you want to allow or deny on the network.
- Access Router Settings: Log in to your router’s admin panel.
- Input Addresses: Navigate to the MAC filtering section and input the MAC addresses as needed.
- Apply Settings: Save your changes and restart the router for them to take effect.
Setting up a Guest Network
A guest network is a separate network that allows visitors to access the internet without giving them access to your main network and the devices connected to it.
- Enable Guest Network: Log into your router’s admin panel and look for the “Guest Network” option.
- Configure: Set up the SSID and password for the guest network.
- Limit Access: Specify which resources the guest network can and cannot access.
VPN (Virtual Private Network)
A VPN enhances your online privacy by encrypting your internet connection. This is particularly useful if you frequently conduct sensitive transactions or wish to maintain anonymity online.
- Choose a VPN Service: Pick a reputable VPN provider that fits your needs.
- Install VPN: Download and install the VPN software on devices that will connect to the network.
- Connect: Turn on the VPN before accessing the internet for an added layer of security.
Conclusion
Securing your home network is not something to take lightly. By implementing these network security measures, such as setting a strong password, enabling a firewall, utilizing MAC address filtering, setting up a guest network, and using a VPN, you are taking significant steps towards protecting your network and the valuable information it may contain.
How to Troubleshoot Common Issues
Even with a well-configured home network, you’re bound to run into issues at some point. Knowing how to troubleshoot these problems can save you a lot of time and frustration. This section will guide you through troubleshooting some of the most common network issues.
Connectivity Issues
When you can’t connect to the internet, or if the connection is inconsistent, here are some steps to resolve connectivity issues:
- Check Modem and Router: Make sure both your modem and router are plugged in and working correctly. Look for any unusual lights on these devices.
- Restart Devices: Turn off your modem and router for at least 30 seconds, then turn them back on and wait for them to fully restart.
- Check Cables: Inspect all cables connecting your devices to the modem and router. Replace any damaged cables.
- Contact ISP: If you’re still experiencing issues, it might be a problem with your Internet Service Provider (ISP). Give them a call to find out if there’s an outage or other issue affecting your area.
Slow Internet
Sluggish internet speeds can be a frustrating problem. Here are some troubleshooting tips for slow internet:
- Run a Speed Test: Use an online speed test to check your internet speed. If it’s slower than expected, proceed with the following steps.
- Check Bandwidth: Make sure no other devices are hogging the network bandwidth with large downloads or streaming.
- Restart Router: Sometimes, simply restarting your router can improve speeds.
- Change Wi-Fi Channel: Interference from other networks could slow down your Wi-Fi. Access your router settings to change the Wi-Fi channel.
- Consult ISP: If all else fails, consult your ISP to see if there’s an issue on their end or if you need to upgrade your plan.
Devices Not Showing Up
If some of your devices aren’t showing up on the network, try these steps:
- Check Device Settings: Make sure the device you’re trying to connect has its Wi-Fi or Ethernet settings configured correctly.
- Restart Device: Sometimes, simply restarting the device can resolve network recognition issues.
- Check MAC Filtering: If you’ve enabled MAC address filtering on your router, make sure the device’s MAC address is added to the whitelist.
- Update Device Drivers: Outdated network drivers can cause devices not to show up. Make sure all device drivers are up-to-date.
Conclusion
Troubleshooting network issues can be a daunting task, but with the right approach and some patience, most problems can be resolved efficiently. This guide should equip you with the necessary steps to tackle connectivity issues, slow internet, and devices not showing up on your network.
Advanced Features and Options
Once you’ve mastered the basics of setting up and securing your home network, you may be interested in diving into some of its more advanced capabilities. Two prominent advanced features you may want to consider are Port Forwarding and Quality of Service (QoS). Understanding and utilizing these options can significantly improve your network’s performance and functionality.
Port Forwarding
Port forwarding is a technique used to direct incoming internet traffic to a specific device or application on your network. This is especially useful for hosting servers or for activities like online gaming. Here’s how you can set it up:
- Identify the Port: Determine which port(s) the application or service requires to be opened.
- Log into Router: Access your router’s admin panel through your web browser.
- Navigate to Port Forwarding: Usually found under advanced settings, navigate to the port forwarding section.
- Configure: Enter the IP address of the device and the port number you wish to forward.
- Save and Test: Save your changes and test to ensure the service is accessible from an external network.
Quality of Service (QoS)
Quality of Service (QoS) is a feature that allows you to prioritize certain types of traffic over others. This is extremely useful for ensuring that critical applications receive the bandwidth they require, even when the network is congested. Here are steps to enable and configure QoS:
- Log into Router: Access your router’s admin panel.
- Find QoS Settings: Navigate to the Quality of Service or QoS section.
- Set Priorities: Assign high priority to essential services like VoIP or streaming, and lower priority to less time-sensitive activities like downloads or file transfers.
- Apply Changes: Save your changes and restart the router for them to take effect.
Conclusion
Incorporating these advanced features into your home network setup can significantly enhance its functionality and efficiency. Port Forwarding allows you to direct traffic to specific devices or applications, making it ideal for hosting servers or gaming. On the other hand, Quality of Service (QoS) lets you prioritize network traffic, ensuring essential applications get the bandwidth they need.
Conclusion
After traversing the intricate but rewarding journey of setting up and securing your home network, you should now have a robust, efficient, and secure system in place. This guide aimed to take you through the why and how of home networks, diving into types, setup procedures, security measures, and even some advanced features.
Summary
To sum it up, you should now understand:
- Why You Need a Home Network: For better connectivity between devices, sharing internet resources, enhanced security, and easier management.
- Types of Home Networks: The pros and cons of wired (Ethernet) and wireless (Wi-Fi) networks.
- Essential Setup Requirements: Hardware and software necessities like modems, routers, and Ethernet cables.
- Preparation Steps: Ensuring a stable internet connection and updating router firmware before setup.
- Step-by-Step Setup Guide: Detailed procedures for setting up both wired and wireless networks.
- Network Security Measures: How to protect your network using strong passwords, firewalls, MAC address filtering, and more.
- Troubleshooting Common Issues: How to resolve connectivity issues, slow internet, and problems with device visibility.
- Advanced Features: The significance of advanced options like Port Forwarding and Quality of Service (QoS).
Importance of Regular Network Maintenance
Setting up your network is just the beginning. For enduring performance and security, it’s crucial to engage in regular network maintenance. This includes frequently updating your router’s firmware, monitoring for unusual activity, and running periodic speed tests to ensure you’re getting the service you’re paying for. Scheduled audits of your security settings can also help identify and plug any potential vulnerabilities before they become issues.
Final Thoughts
Whether you’re a seasoned tech enthusiast or a beginner looking to improve your home’s internet setup, understanding the ins and outs of home networking can provide you with a stable, secure, and efficient online environment. As the digital age continues to evolve, staying ahead of the curve in network setup and maintenance is more important than ever.
Thank you for journeying through this comprehensive guide. Here’s to a secure, efficient, and high-performing home network!